Gunnery guide: Leopard 2
Overview
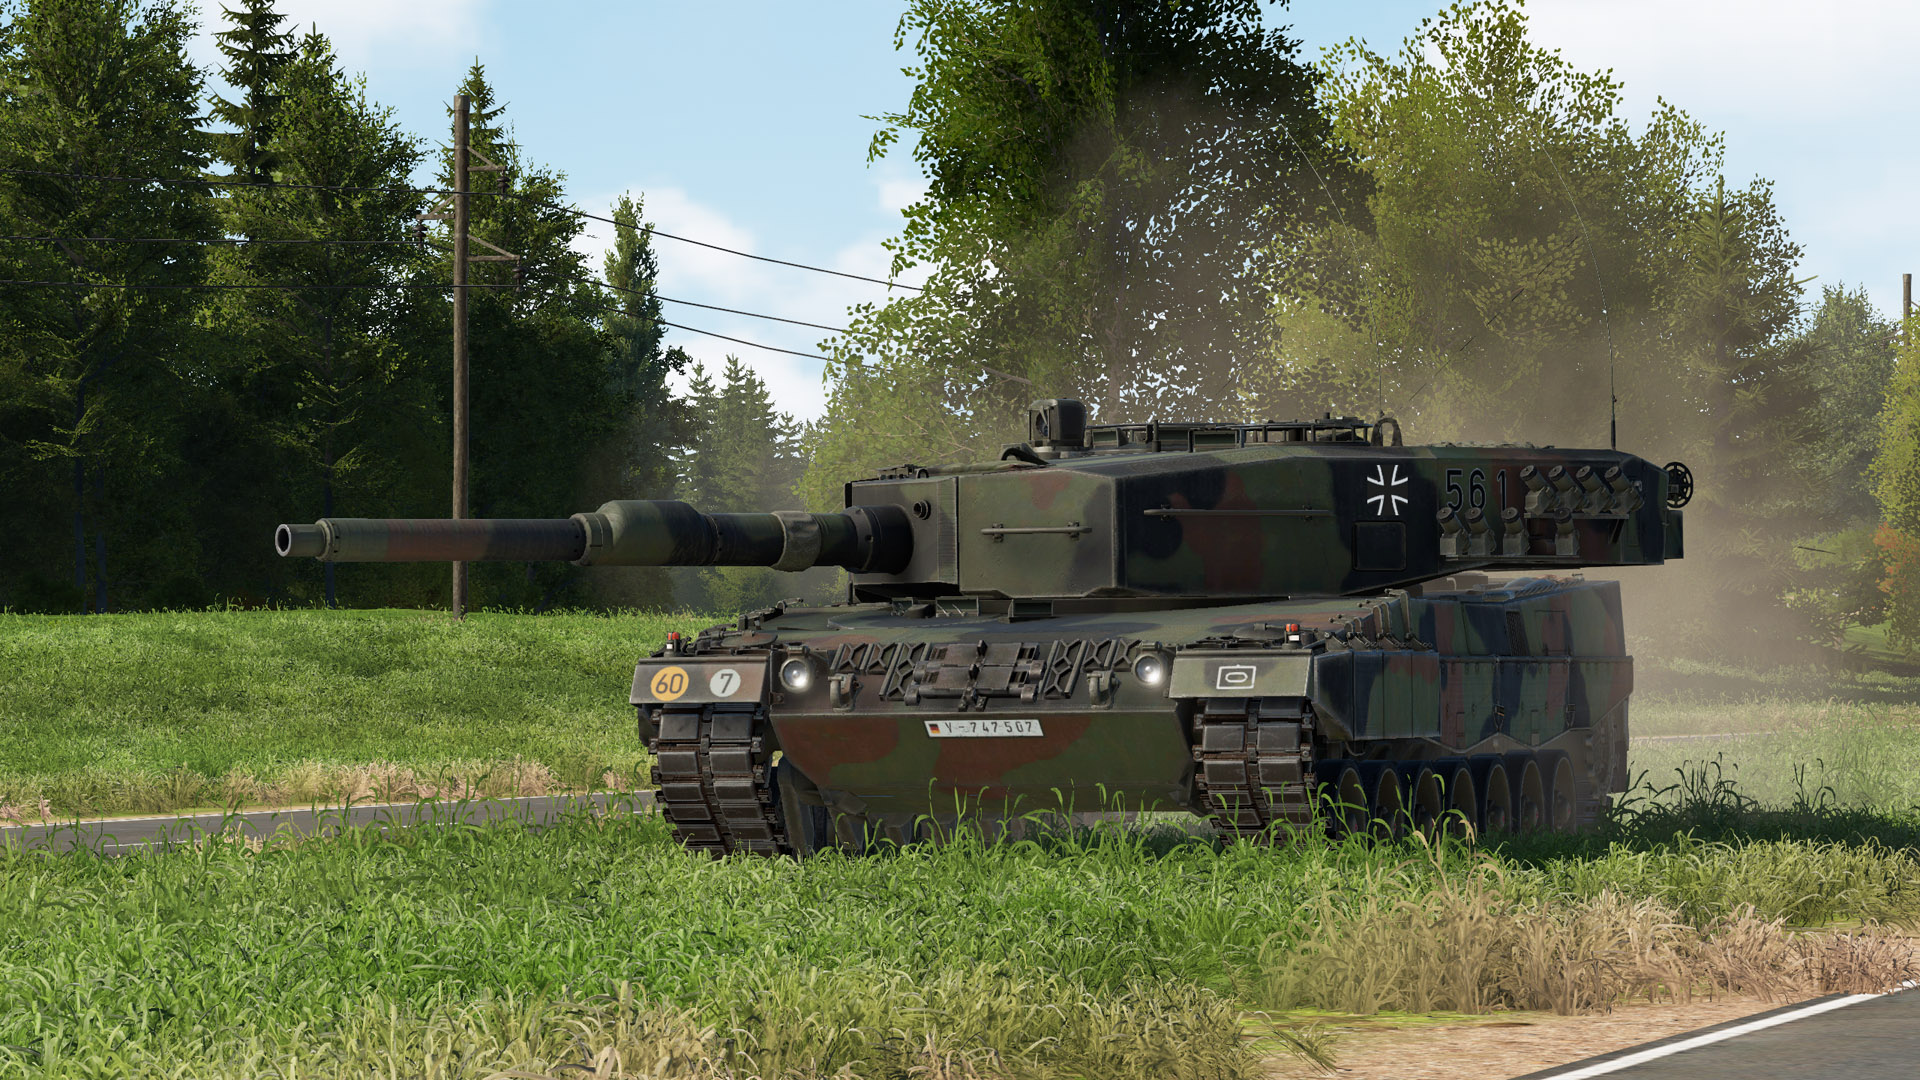
One of the most legendary Cold War era armor designs, the Leopard 2 scarcely needs introduction. A latecomer to the East vs. West armor matchup, it brings a high level of technology, competent armor protection, and cutting-edge firepower. The tank's design was so well executed that variants of it (with few core feature changes) are used in well-funded armies across the world to this day.
Operating the Leopard 2 is not difficult, but high effectiveness does require some prior knowledge of its features. To that end, it's important to read and understand this guide to get the most out of the tank in GHPC.
Variants
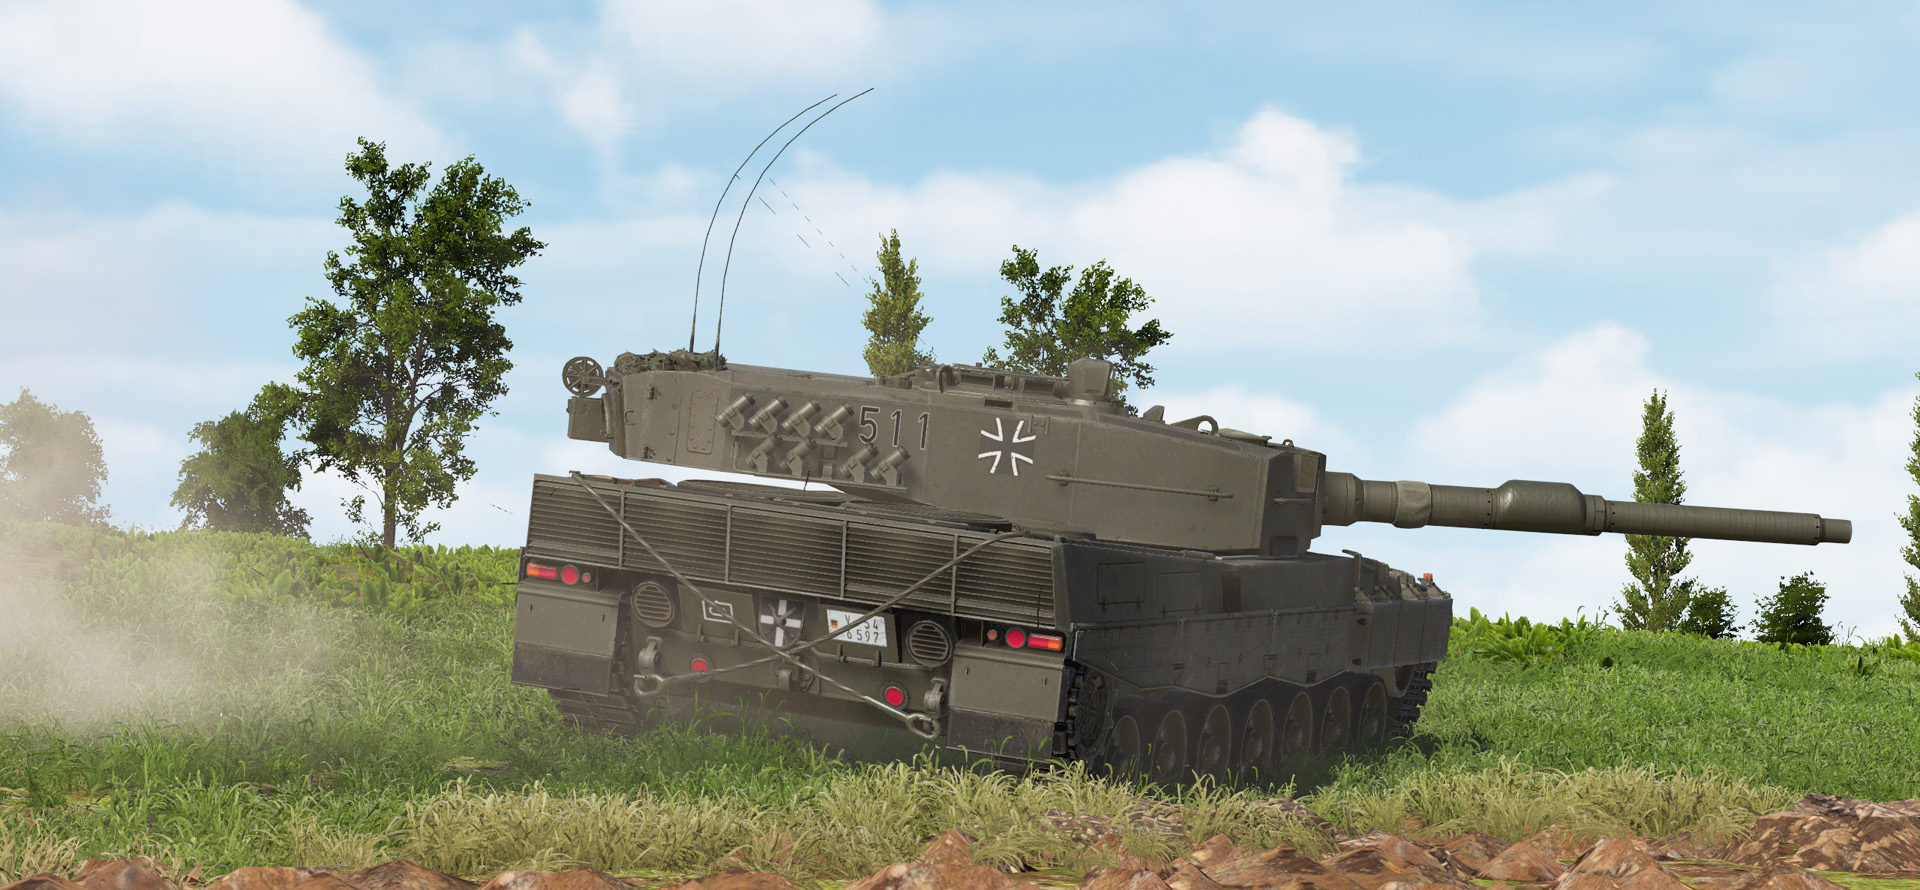
Despite the Leopard 2A4 getting the lion's share of the recognition in tank fan culture, in mid-1985 this version was not yet a reality. Instead, GHPC depicts the preceding variants that were fielded in the Bundeswehr fleet. Their differences are so few that they cannot be meaningfully represented on a chart - instead, here's a short text summary of each.
Leopard 2
.jpg)
- Sometimes called Leopard 2A0 in hindsight
- Initial production version with no thermal sight
- PZB-200 night vision sight mounted to the gun mantlet provides low-light spotting abilities
- In all meaningful respects, otherwise identical to the next few variants
- By the mid-'80s, gradually being converted to Leopard 2A2
Leopard 2A1
.jpg)
- Includes a factory-installed thermal sight, equivalent to those used on the M60A3 TTS
Leopard 2A2
.jpg)
- Former early-batch Leopard 2 that has been converted to the Leopard 2A1 standard by having a thermal sight installed
Leopard 2A3
.jpg)
- Upgraded with new radio equipment
Since we don't depict the radios in GHPC, we've instead opted to give the 2A3 variant the tri-tone woodland paint scheme that was coming into prevalence in the Bundeswehr in the mid to late '80s.
Any other differences between variants are extremely minor cosmetic elements that do not affect the abilities or operation of the tank, so they are excluded from mention here.
What about the 2A4?
Though the Leopard 2A4 is not depicted in GHPC due to arriving in service too late, many people will likely wonder what could have been if it had been included. It's worth noting, then, that nothing relevant changed between the Leopard 2A3 and the early production Leopard 2A4. Some fire control system (FCS) components were switched to digital versions, which had essentially no impact on the look or feel of the system in actual use. There were also some minor cosmetic changes, such as the removal of the side hatch on the turret. Yet none of the actual capabilities of the tank, including weapons, FCS, and armor, were any different. Even the vaunted "C-tech" armor package for late-production Leopard 2A4s was not introduced until years later.
So, in summary: what would be different if there were a Leopard 2A4 in GHPC? Nothing! You can play the Leopard 2A1 through 2A3 and rest assured that it's the same tank.
Gunner's day sight (EMES-15)
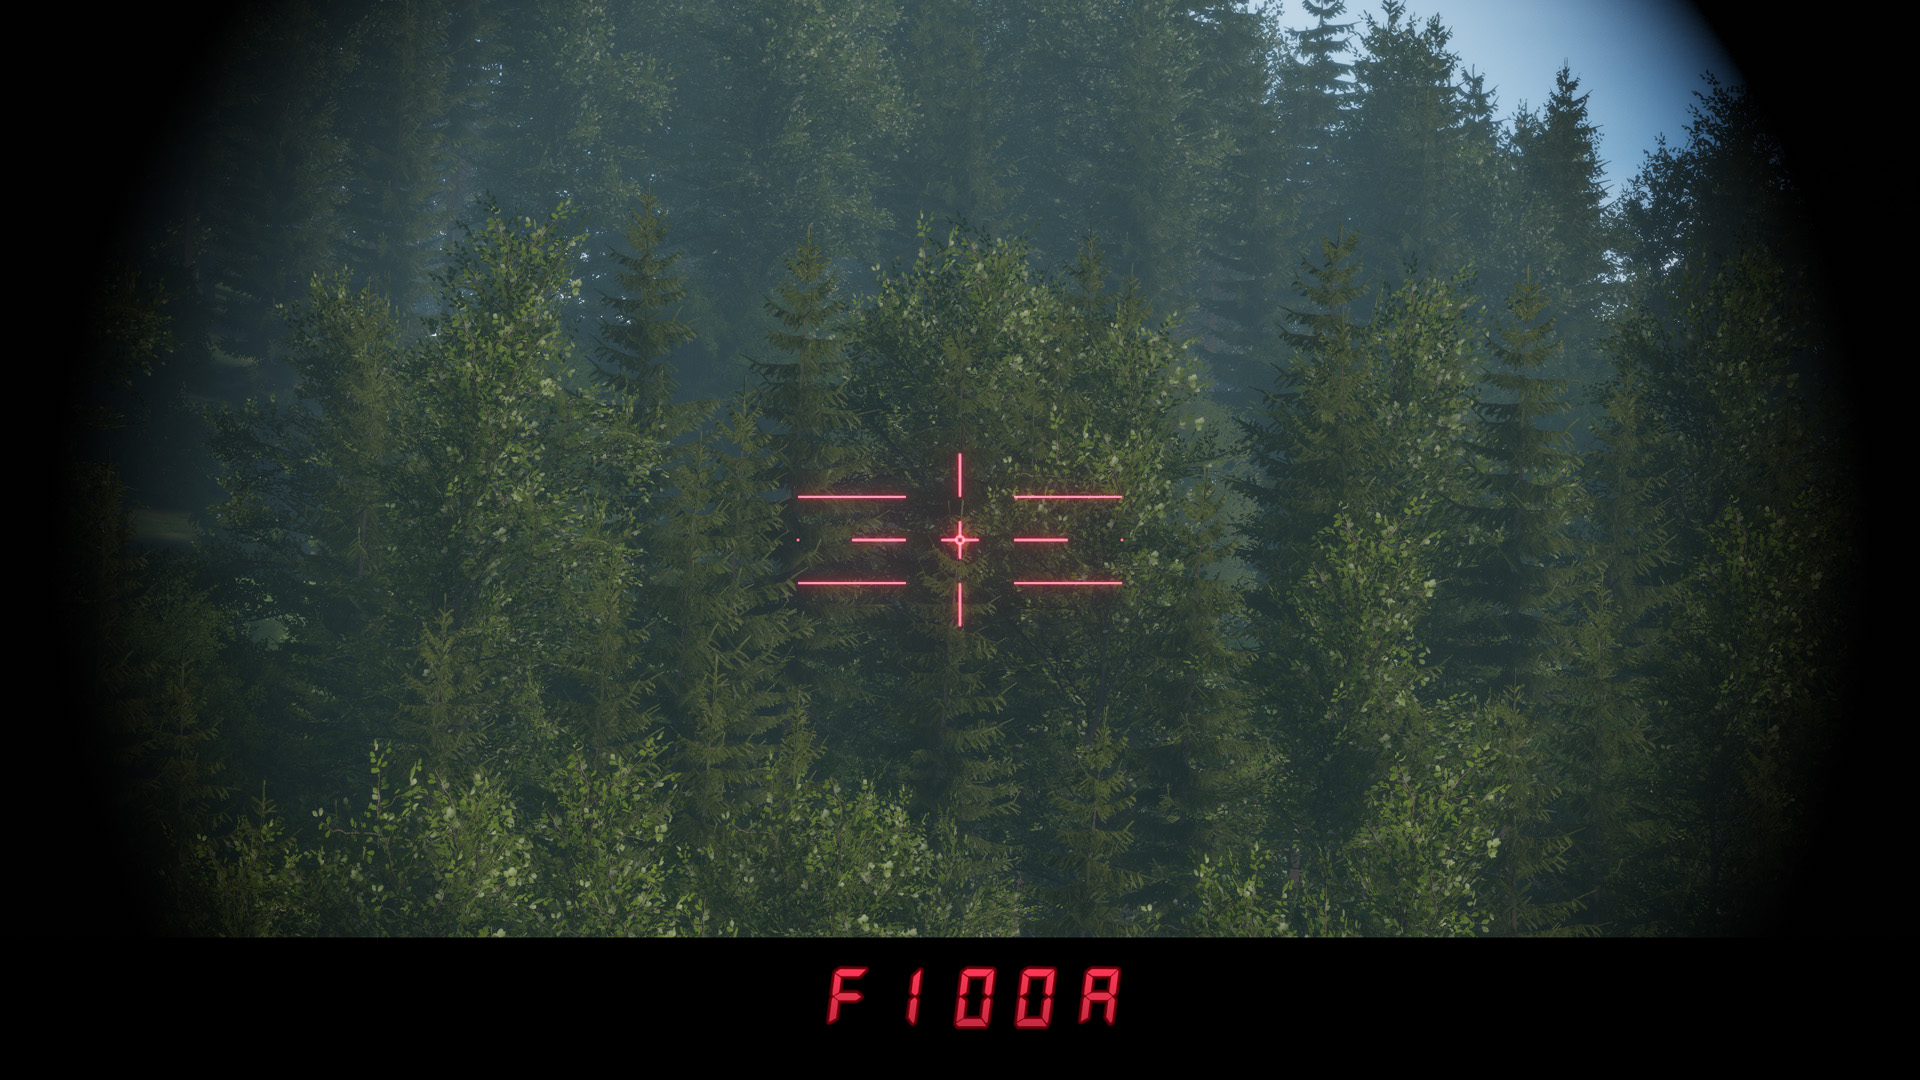
The Leopard 2 is equipped with a fixed 12x magnification day sight of the modern NATO style: a clean reticle with a laser rangefinder aim point in the center. Though the reticle has fixed mil dimensions that can be studied and used for rangefinding in a pinch, this is a tertiary concern, and the intended use of the sight is to simply put the circle on the target, lase, and fire.
The default "battlesight" range for the FCS is 1000 meters. As with every tank in GHPC, you can reset to this default range at any time by pressing LCtrl + range down.
Symbology
At the bottom of the sight view is an alphanumeric display that conveys the current gun ready state, FCS range, and ammunition type.

(Above: Some of the possible states of the display in different situations)
The first digit is either "F" for ready or "0" for not ready. A not-ready state can be due to the gun being unloaded, or it can result from the gun failing to line up with the sight (for example, when the stabilizer is trying to catch up to harsh movement).
The next three digits show the range setting, with the final place trimmed off. (For example: 150 means 1500 meters.) This limits the precision of the range readout to 10 meters, which is fairly typical for this kind of gunnery system and certainly sufficient for the task.
The final character indicates which ammunition or weapon type is in use. An "A" indicates the first ammo slot for the main gun, traditionally kinetic APFSDS rounds. A "b" indicates the second ammo slot, which by convention is HEAT rounds. A "d" indicates that the weapon selection has been switched to the coaxial 7.62mm machine gun. (There is a "C" option as well, but this third main gun ammo slot was not used by the Bundeswehr in this era.)
Gunner's thermal sight (WBG)
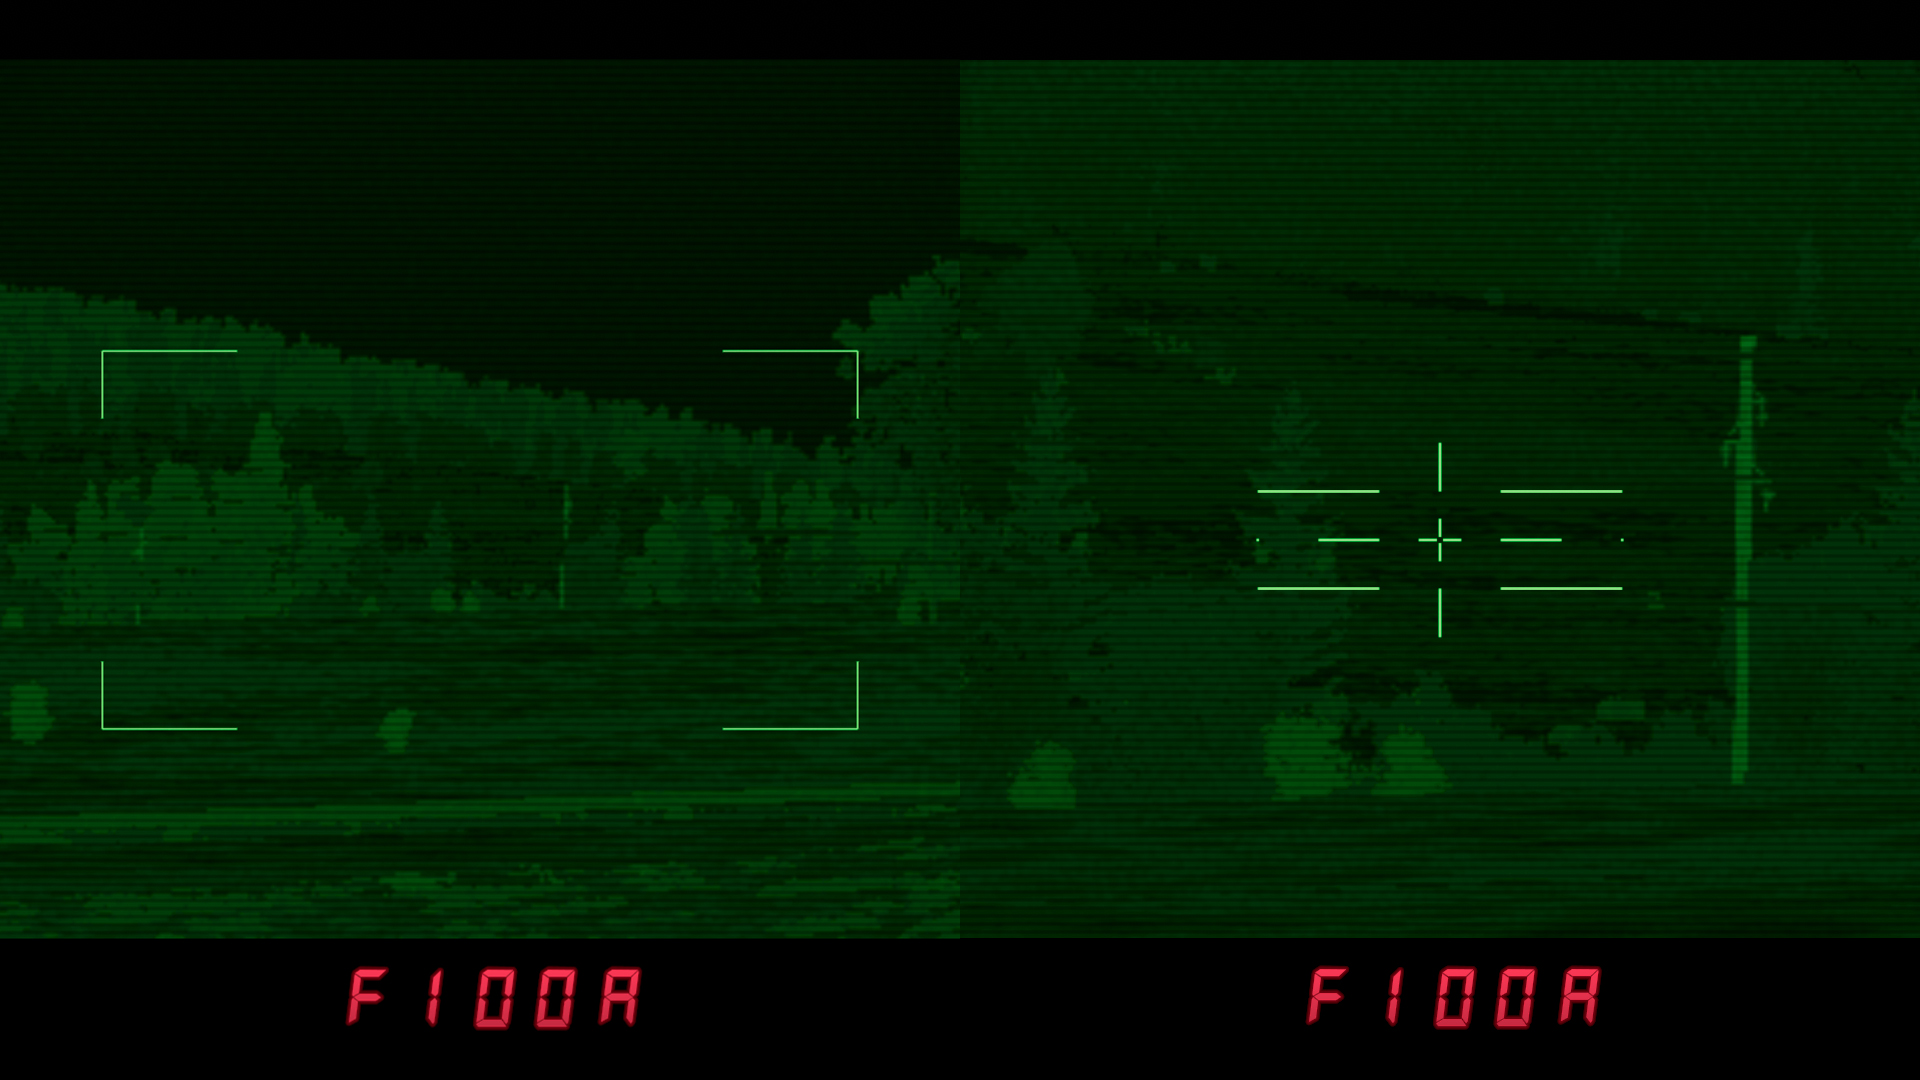
For low-light or general enhanced target sensing, the Leopard 2A1 variant and onward are equipped with an infrared thermal sight, of a similar hardware specification to the ones used on American tanks of the same era. The fire control system is fully integrated with this sight, so it can be used exactly the same way as the day sight for most purposes. (It must be noted, however, that the day sight is still the better way to verify that a target is actually an enemy!)
The thermal sight has 4x and 12x zoom levels available for scanning and combat purposes respectively. This makes the thermal sight (in wide field-of-view mode) the preferred tool for observation, followed by a jump into the zoomed-in day sight for actual gunnery.
When using the thermal sight in combat, be cautious around obscurant smoke clouds. Thermal optics will see straight through most kinds of obscurant smoke (including smoke grenades launched from the Leopard 2 itself), but the vehicle's laser rangefinder will still bounce off of the smoke cloud and return a bad range. If you laser rangefind into smoke without being aware of it, you will miss your shots and waste precious time on the follow-up. It's a good idea to occasionally check your day sight to ensure that your line of sight is actually clear before engaging.
(As a reminder, you can instantly pop the next available set of smoke grenades in compatible vehicles by pressing G.)
Gunner's night vision sight (PZB-200)
On the earliest variant of the Leopard 2, there is no thermal sight, and instead the PZB-200 night vision system is installed. This unit is mounted on the gun mantlet, making it susceptible to any state changes that affect gun position, such the automatic elevation of the barrel during a reload. In addition, the tank does not have a gunner's infrared searchlight installed to aid the night vision system - you are limited to whatever visibility is afforded by moonlight and other battlefield conditions.
For detailed information on how to use the PZB-200 system, see the Leopard 1 guide.
Auxiliary sight (FERO Z18)
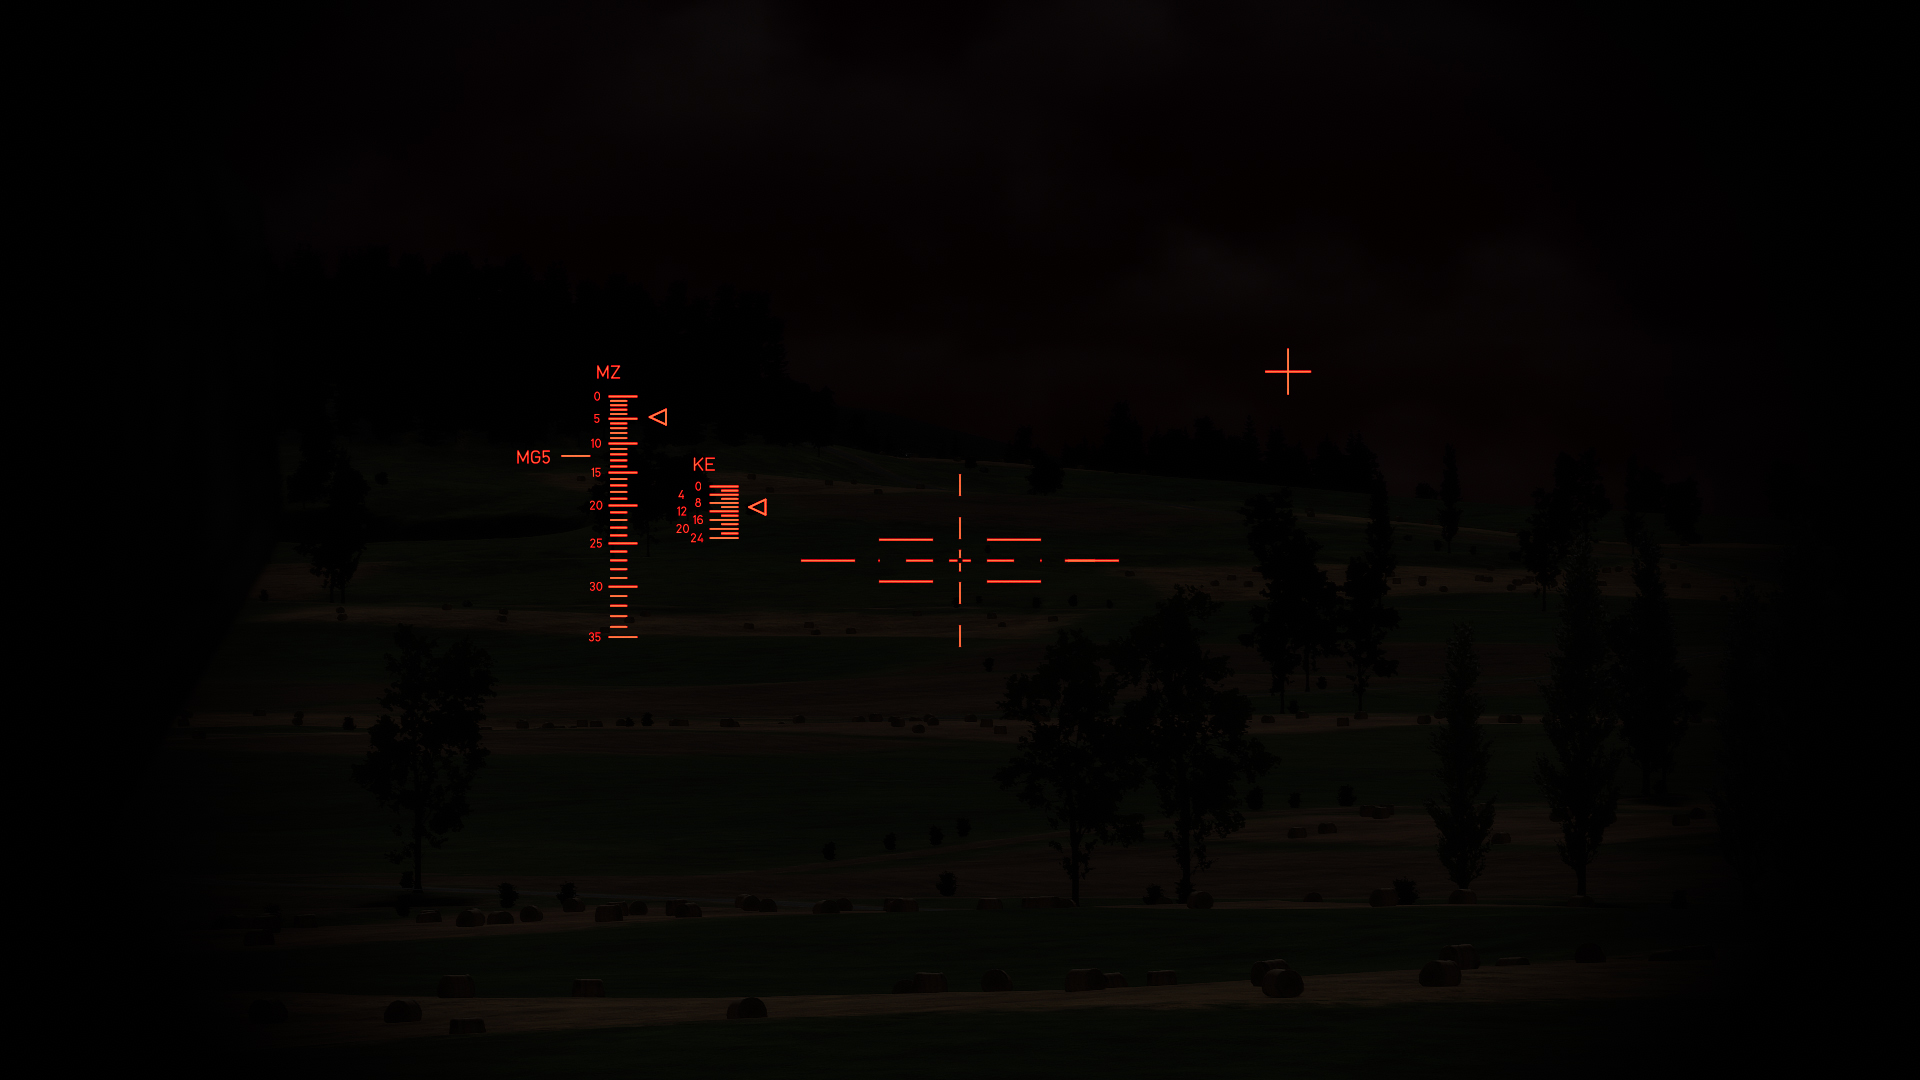
For situations where the main sight is damaged or insufficient (e.g. checking terrain clearance for the gun barrel), the auxiliary sight provides a lower-tech way to aim. It accounts only for superelevation, using ammunition scales etched into the glass directly. The pointer symbols show what range the system is adjusted to for each ammo type, but it's the gunner's responsibility to look at the correct scale for the current weapon and ammo. (In GHPC, the scales are automatically adjusted to suit the current ammo and range setting.) The reticle can be illuminated using the relevant key (default: i).
Point stabilization
Unlike most tanks of the era, the Leopard 2 uses a stabilization standard we refer to as "point stabilization": an attempt to keep the sight lined up on a specific point in space, rather than keeping it aligned in a direction. To look at it another way: as you drive, a point-stabilized system will turn the turret to keep "looking at" the spot you lased before, while a typical direction-stabilized system will keep the gun steady in the exact angle it was at before.
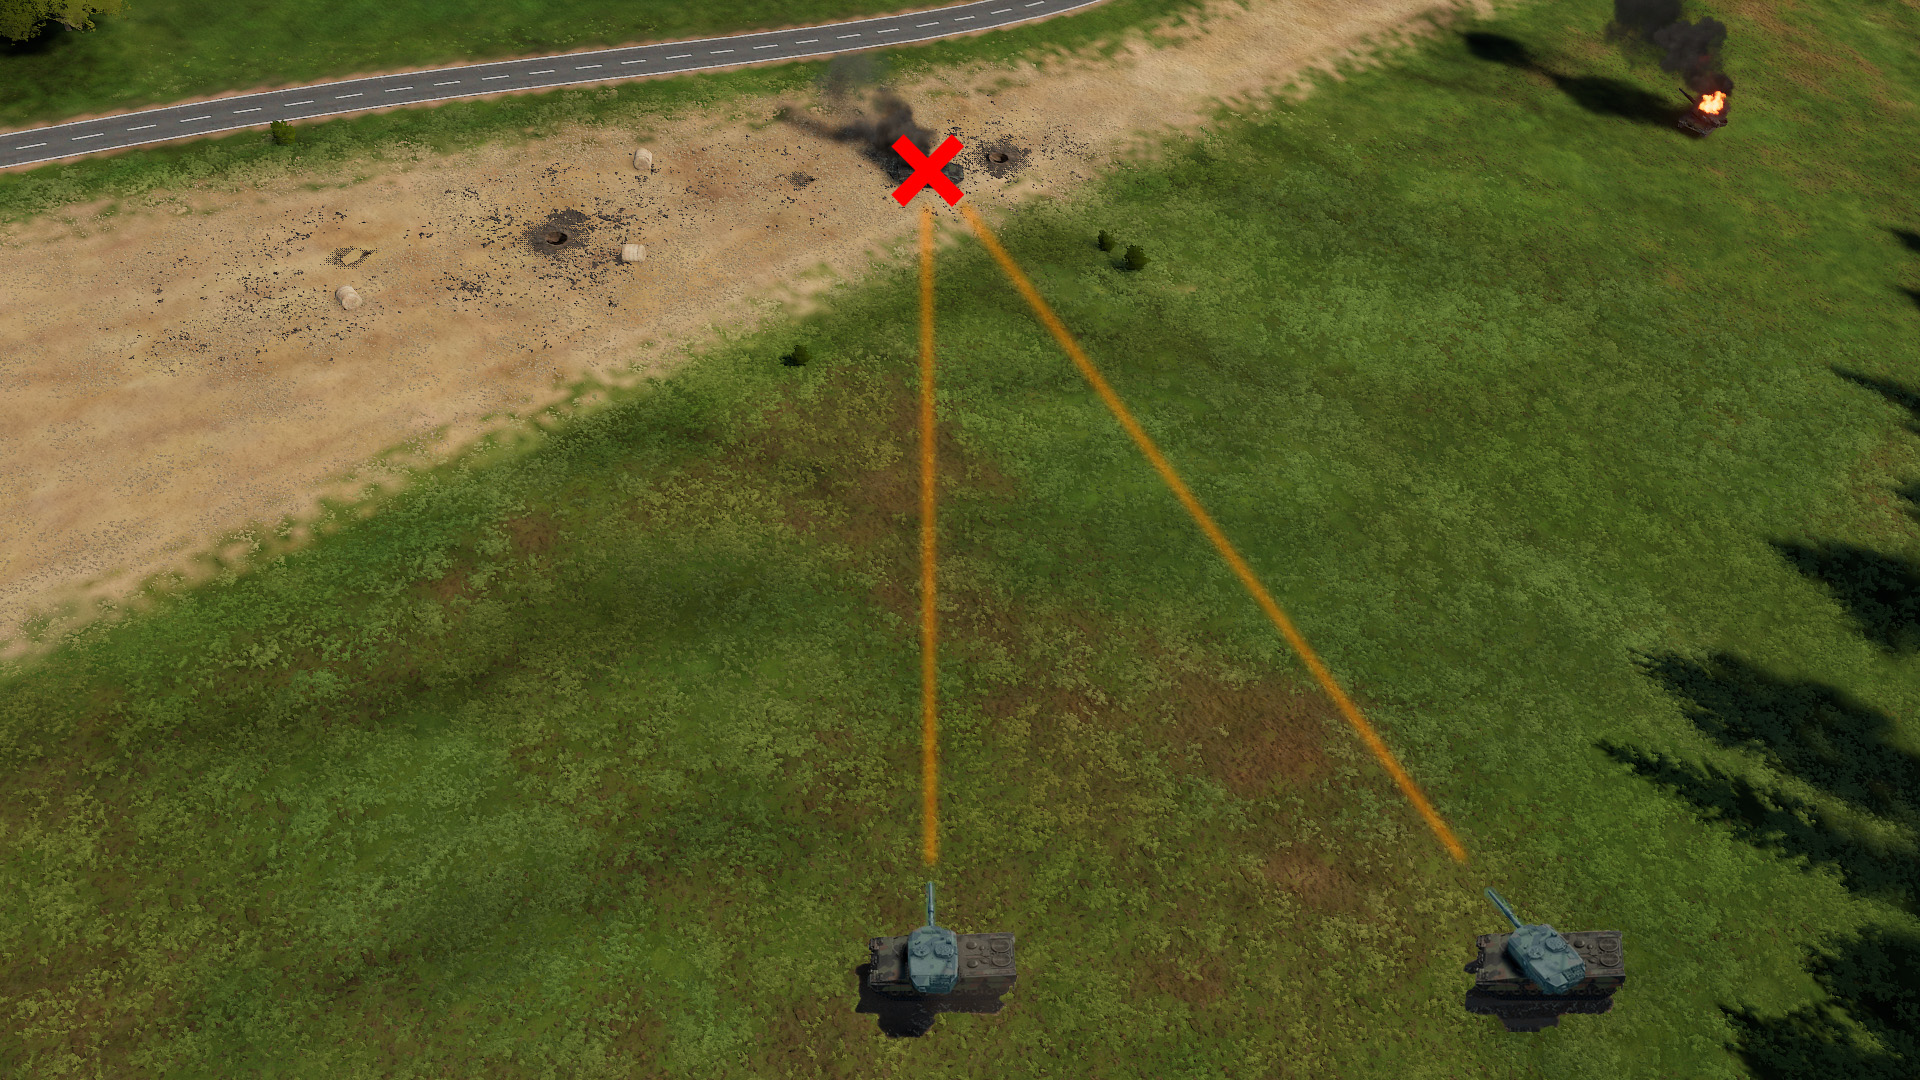
In a real Leopard 2, this stabilization is only active when the gunner is holding the grip switches on the control handles. However, in GHPC, we make the gameplay concession that all stabilized tanks are presumed to have the gunner keeping the stabilizers active at all times (this applies universally, as seen in e.g. the Abrams, which in the game does not require constant button pressing to keep the stabilizers on). For this reason, point stabilization is also always-on for the Leopard 2 in the game.
Automatic counter-momentum
Due to the way the Leopard 2's FCS works, this stabilization provides an additional ability beyond keeping the gun on target: it drives an automatic gun aim compensation routine so that any shot you fire while moving will account for your own tank's momentum. If you are driving left from the gunner's perspective, your gun is aimed slightly right. If you are driving downhill, your gun is aimed slightly up. This process is completely invisible to the gunner, as the gunner's sight counter-rotates to keep the target and reticle centered, disguising all the adjustments being made by the turret and gun. The fact that the gunner's sight can do this counterrotation in both the horizontal and vertical directions makes it a "dual-axis stabilized" system, similar to the sight used in the T-80B's 1A33 fire control system.
It's worth noting here that despite these advanced FCS features, the tank is still operating based on imperfect sensor readings whose performance is best when you don't push them too hard. Focusing on smooth driving and low speeds will help you score hits without outpacing the fire control computer or the gun's fire gating. If you must fire on the move, setting the cruise control (default: numpad +/-) will get you better results than holding W.
Dynamic lead
While the point stabilization and counter-momentum aim adjustment are always active, the Leopard 2 also has a gunner-controlled lead feature for moving targets. The compensation specific to moving targets is known as "dynamic lead". This feature is fundamentally the same as the lead feature in tanks like the M1 Abrams or the T-80B: the direction and speed of the gunner's aim point adjustment is used to infer how the target is moving, and the shot is aimed "ahead" so it will land where the target is going to be at the time it arrives.
Unlike the T-80B's 1A33 system, however, the Leopard 2's FCS does not always use dynamic lead. The gunner must choose to engage it by holding the lead control, and as soon as this is released, the dynamic lead is reset to zero again. In GHPC, there are two ways to accomplish this: by holding the rangefinder key (default: E), or by holding the alternative lead button (default: Caps Lock). This is the same control scheme used for the lead feature of the Leopard 1A4.
Dynamic lead is additive with the rest of the aim corrections made by the FCS. That is to say, engaging dynamic lead does not cancel any of the other features, such as counter-momentum. However, for the Leopard 2 it's considered incorrect form to engage dynamic lead for a stationary target, due to the risk of the gunner accidentally making small adjustments to the aim point before firing, thereby inducing a dynamic lead shift that throws the round off target.
Dynamic lead uses an average of the gunner's inputs from the last 1 second of time. What this means in practice is that before firing you must hold a steady track on the center of the target for at least 1 second, with a valid range number and dynamic lead engaged, in order to be assured of a hit. Any wavering or error will likely throw your shot off target. Practice target tracking until you can keep the reticle stuck to one spot on the target, as if it were glued on!
Protection and weak points
The Leopard 2 is outfitted with fairly strong composite armor protection across the frontal arc, including the front and sides of both the turret and hull. Like most modern tanks, it focuses the majority of this protection on the turret, owing to the fact that the vehicle is expected to take most hits while in a hull-down stance, hiding the weaker bottom half behind terrain.
Above the turret ring, the Leopard 2 presents a remarkably similar armor prospect to the M1 Abrams. It has strong anti-HEAT performance and very good anti-kinetic protection as well, even negating the would-be weak spot in the gunner's sight cutout by simply having an equal depth of additional composite armor behind the sight. If the ready rack in the turret bustle is penetrated (and the firewall is intact with a closed loader door), a blowoff panel on the roof allows explosions and flames to vent upward, protecting the crew.
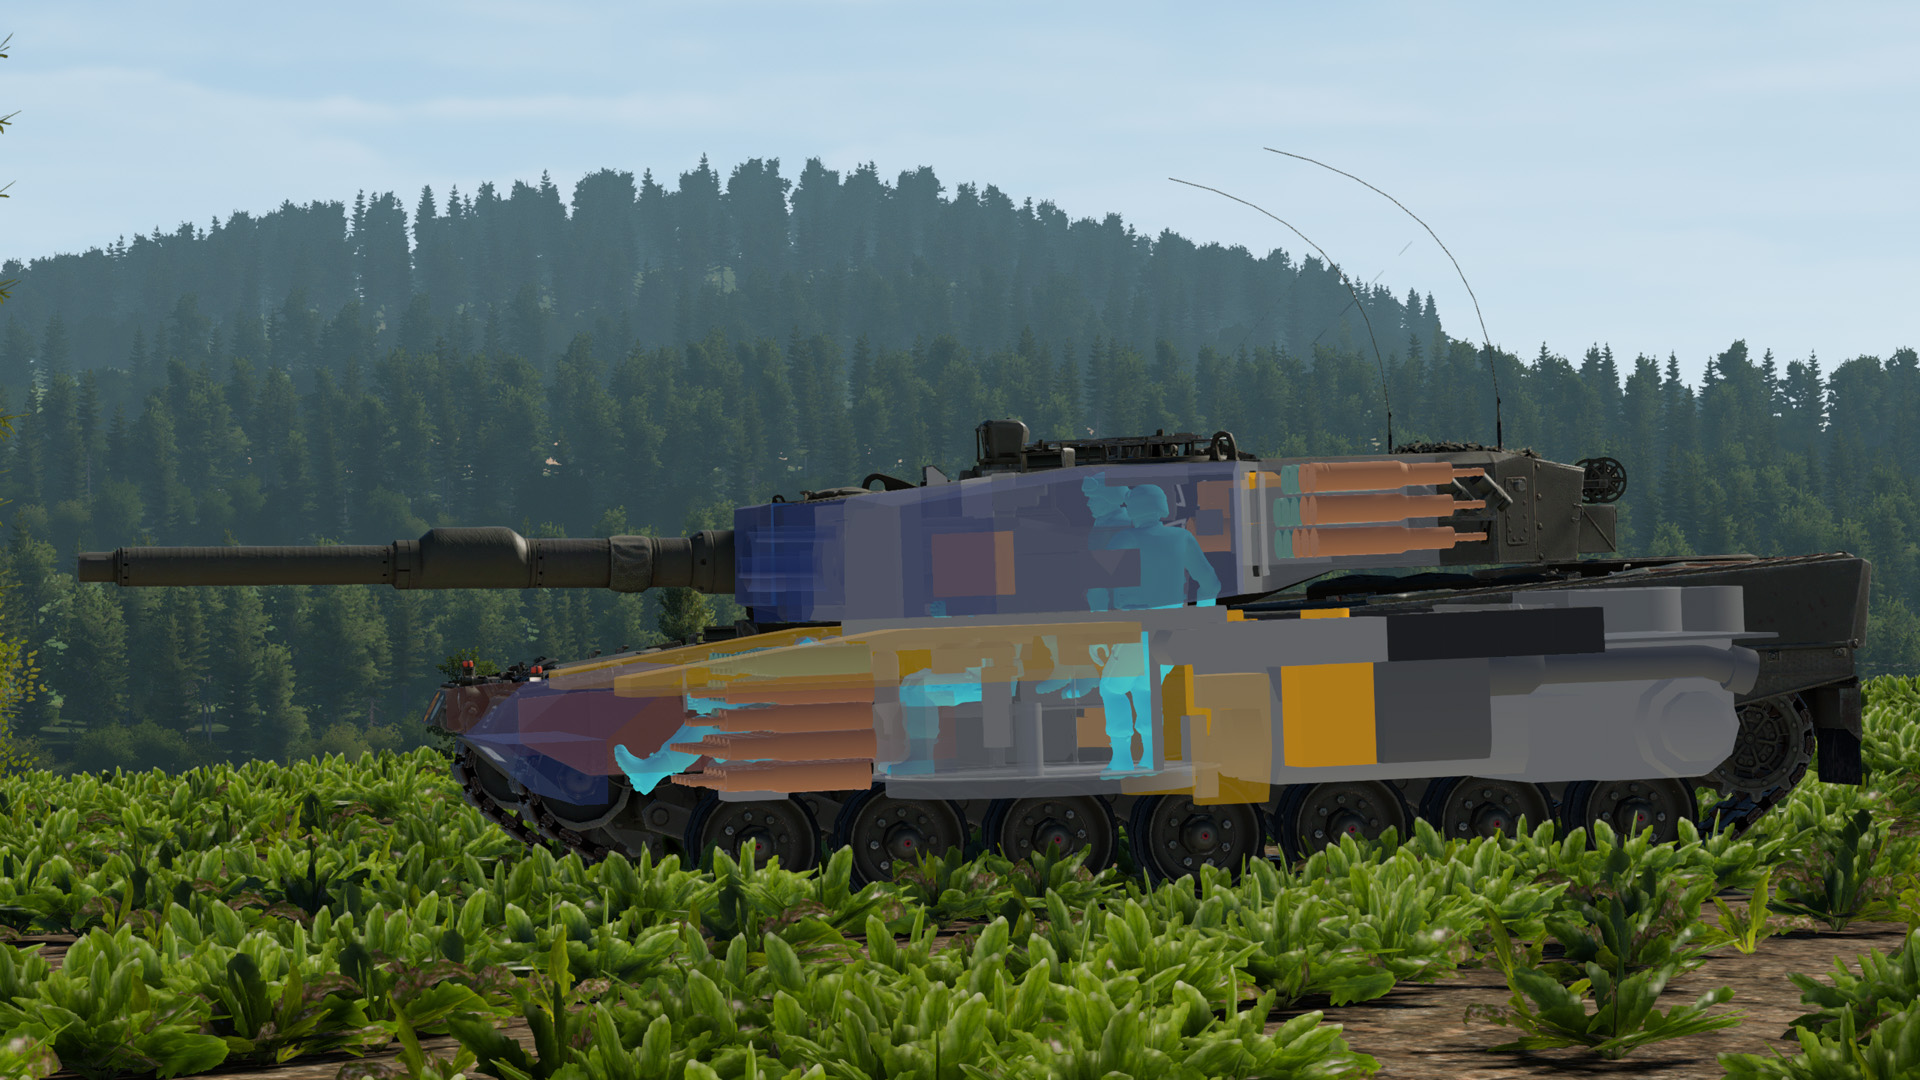
Below the ring, the situation is different. The composite protection isn't enough to defend against many contemporary kinetic rounds at combat range, creating a large weak spot that must be managed. To make matters worse, the majority of the onboard ammunition is stored in a large rack next to the driver. Taking a penetrating frontal hit into the left side of the hull spells certain doom and can even blow the entire turret off. When driving a Leopard 2, do not place yourself in a position to allow the enemy to make this shot!
Armament
With a familiar "sabot and HEAT" loadout paired with a coaxial machine gun, the Leopard 2 is fairly easy to use offensively. Of note, however, is the fact that the standard ammunition it carries is quite new and powerful in the 1980s. In particular, the 120mm DM23 APFSDS round is one of the very highest performing darts in the game in terms of raw penetrative power and energy retention. The HEAT round is no slouch, either, featuring a large explosive charge, strong armor piercing performance, and a shoulder fuze for more reliable detonation on sloped armor. As long as you play smart and keep yourself alive, taking down targets in the Leopard 2 should be a breeze.
Conclusion
A truly cutting-edge frontline tank in 1985, the Leopard 2 takes its place as one of the flagship vehicles in GHPC. Players who study its quirks and account for its flaws will find their diligence rewarded with highly effective performance.
.jpg)